Printing OTC Labels
WordPad can be used to print labels for OTC medications. WordPad is a standard Windows application which is available on all computers running Windows.
To create an OTC label in WordPad, you must first create a template with the appropriate margins for your label type.
To create an OTC label:
-
In the Search field of the Windows task bar, type "wordpad."
If you can't find the Windows Search field, select the Windows icon and type "wordpad".

-
Select the WordPad app from the search results.

-
If printing OTC labels on thermal labels, complete the following steps:
-
Select File > Print.
-
In the Print window, highlight the applicable Zebra printer for the OTC label.
-
Select Apply.
-
Select Cancel to close out of the window.
-
-
Select File > Page setup.
-
In the Margins section, set the Left, Right, Top, and Bottom margins for your label type. In the Orientation section, select the appropriate orientation. Use the dropdowns below for more information on the orientation and suggested margins for each label type.
 Margins for Half Labels
Print Area Orientation Left Margin Right Margin Top Margin* Bottom Margin Vial label in top left corner
Portrait 0.25" 5.5" 0.25" 9.1" All vial labels
Portrait 0.25" 1.0" 0.75" 8.0" *You may need to adjust the top margin if you are using pre-printed label sets.
 Margins for Thermal Labels
Print Area Size Orientation Left Margin Right Margin Top Margin* Bottom Margin Vial label
User defined Landscape 6.7" 1.5" 0.2 - 0.3" 0.25" Receipt Use defined Portrait 0.8" 0.25" 0 - 0.05" 6.7" *The top margin may vary depending on the setup of your thermal printer.
-
Select OK.
-
In the toolbar, select the line spacing button
 .
. -
Select 1.0 as the spacing and deselect Add 10pt space after paragraphs.
-
In the first two lines, enter your pharmacy's information (i.e., name, address, phone number). If you are using pre-printed labels, press Enter twice to skip the first two lines.
-
For the third line, press Enter. This will serve as a space between the pharmacy header and the OTC label content.
-
On the remaining lines, enter the OTC information.
-
Select File > Print.
-
Select the Print button to print the label.
-
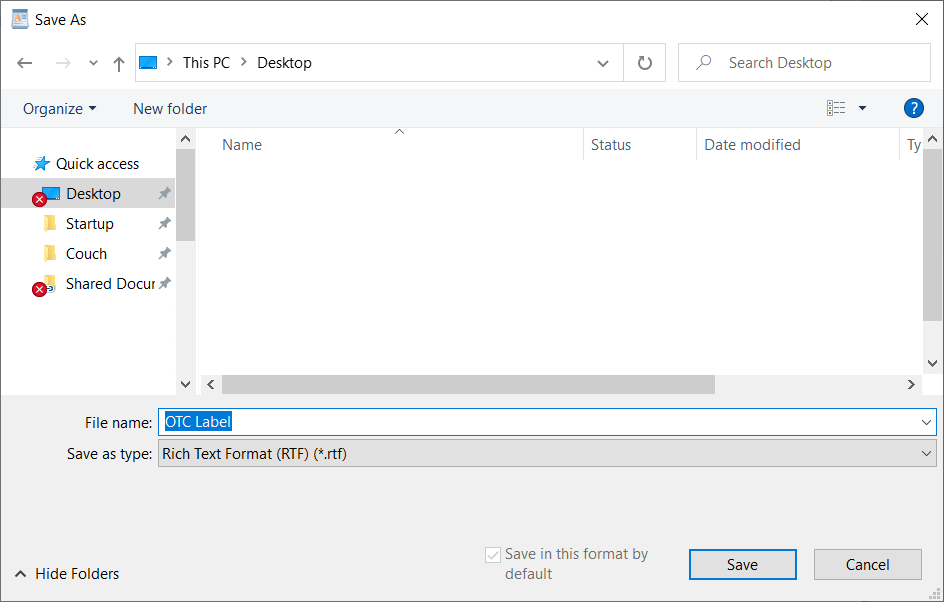
Select File > Save As.
-
Select a location to save the template (i.e., Desktop).
-
Enter a name in the File name field (i.e., OTC Label).

-
Select Save.
If you created a thermal OTC label template, repeat steps 3 - 6 when you reopen the template to print another OTC label.
Troubleshooting OTC Labels
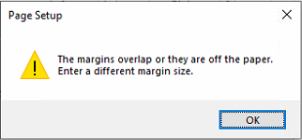
The following prompt can appear if the Zebra thermal printer is set as your default printer for the workstation.

The margins indicated above are based on the assumption that a laser printer is the default printer. The paper size in WordPad adjusts to your default printer, so different margins are required if a thermal printer is the default. Refer to the table below for suggested margins if a thermal printer is the default.
| Print Area | Size | Orientation | Left Margin | Right Margin | Top Margin* | Bottom Margin |
|
Vial label |
User defined | Landscape | 0.25" | 1.5" | 0.2 - 0.3" | 0.25" |
| Receipt | Use defined | Portrait | 0.25" | 0.25" | 0 - 0.05" | 0.25" |
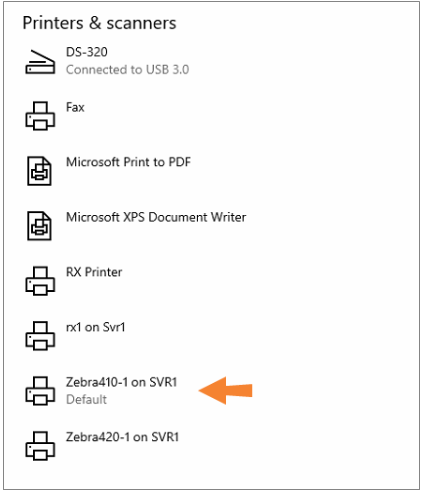
To identify your default printer:
-
In the Search field of the Windows task bar, type "printers & scanners".
If you can't find the Windows Search field, select the Windows icon and type "printers & scanners".

-
Select the matching result.

-
In the Printers & scanners window, a default label is assigned to the default printer. If Let Windows manage my default printer is ON, the printer that was last used form the workstation will be set as the default.

The User defined paper size is available after you apply the thermal printer in the Print window. Complete step 3 above before opening the Page Setup window to set the margins.
The paper size in WordPad follows your default printer. If you have a non-thermal (i.e., laser) printer as the default printer for the workstation, when you reopen your thermal OTC label template, the paper size will revert to what's available for the default printer. Once you apply the thermal printer in the Print window, the margins are reset and must be adjusted again.